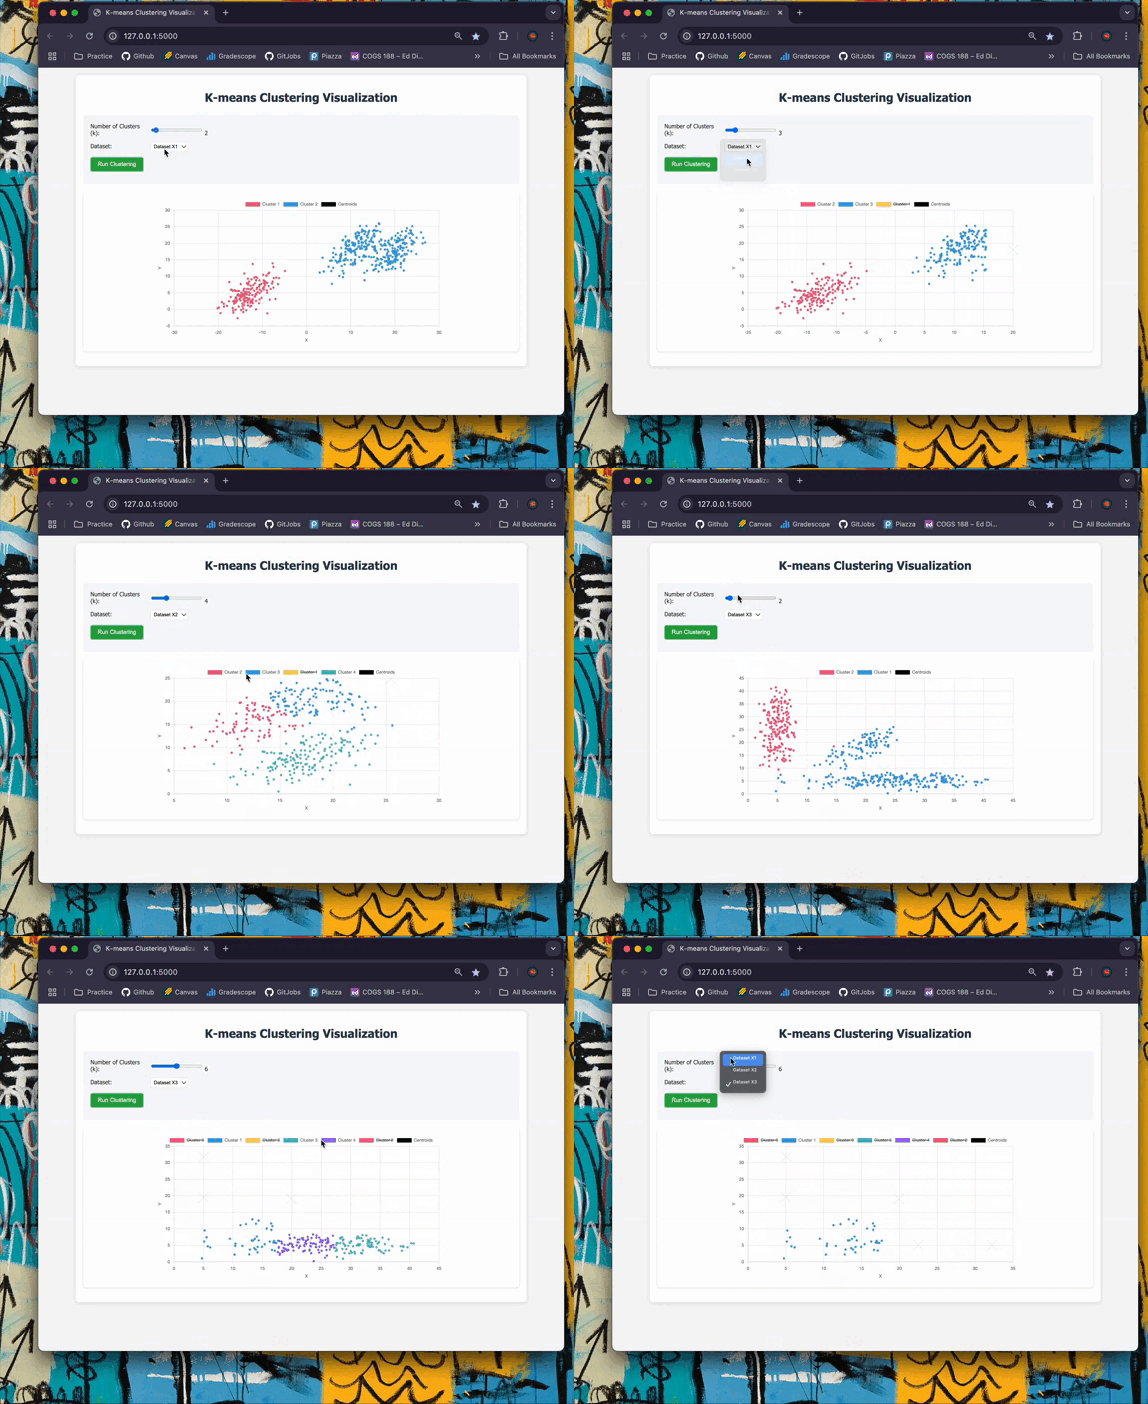
Project Overview
This class project makes K-means easier to inspect by showing each update to the centroids and cluster assignments.
Users can switch datasets, change the number of clusters, and watch the algorithm settle on a result.
Technical Implementation
Key Features
Architecture
The application follows a client-server architecture with a Flask backend and JavaScript frontend:
Algorithm and future work
K-means
The K-means implementation uses the following steps:
Expectation-Maximization (planned)
The planned Gaussian Mixture Model implementation would:
Code Highlights
One of the core algorithm implementations is the K-means model:
class KmeansModel:
    def __init__(self, X, k, max_iters=100):
        self.X = X
        self.k = k
        self.max_iters = max_iters
        self.dim = X.shape[1]
        self.N = X.shape[0]

        indices = np.random.choice(self.N, self.k, replace=False)
        self.centroids = self.X[indices]

    def get_labels(self, X, centroids):
        distances = np.sqrt(((X[:, np.newaxis] - centroids) ** 2).sum(axis=2))
        return np.argmin(distances, axis=1)

    def run(self):
        prev_centroids = None
        iters = 0

        while iters < self.max_iters:
            labels = self.get_labels(self.X, self.centroids)

            new_centroids = np.array([
                self.X[labels == k].mean(axis=0) if np.sum(labels == k) > 0
                else self.centroids[k]
                for k in range(self.k)
            ])

            if prev_centroids is not None and np.allclose(prev_centroids, new_centroids):
                break

            prev_centroids = new_centroids.copy()
            self.centroids = new_centroids
            iters += 1

        return self.get_labels(self.X, self.centroids)
Performance Optimizations
The implementations include several optimizations:
Datasets
The application generates three different datasets to demonstrate how clustering algorithms perform under different data distributions:
These datasets are generated using scikit-learn's make_blobs function and transformed with linear transformations to create more interesting patterns:
def get_X3():
    """Get X3 dataset from notebook implementation"""
    centers = [[5, 5]]
    X31, _ = make_blobs(cluster_std=1.5, random_state=20, n_samples=200, centers=centers)
    X31 = np.dot(X31, np.array([[1.0, 0], [0, 5.0]]))

    X32, _ = make_blobs(cluster_std=1.5, random_state=20, n_samples=200, centers=centers)
    X32 = np.dot(X32, np.array([[5.0, 0], [0, 1.0]]))

    centers = [[7, 7]]
    X33, _ = make_blobs(cluster_std=1.5, random_state=20, n_samples=100, centers=centers)
    X33 = np.dot(X33, np.random.RandomState(0).randn(2, 2))

    X3 = np.vstack((X31, X32, X33))
    return X3
Project Evolution
The project has evolved significantly over time:
Future enhancements planned for this project:
Technologies Used
Learning Outcomes
Through this project, I gained valuable experiences in: